 Pin it
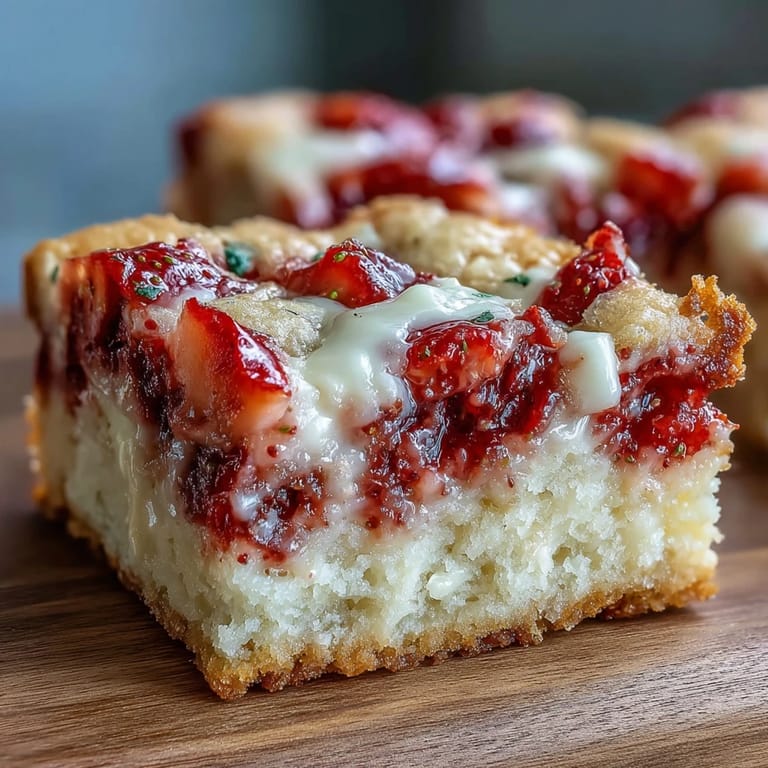
 My neighbor dropped by one afternoon with a basket of strawberries from her garden, and I found myself staring at them on my counter wondering what to do besides jam. That's when I thought of these bars—something that would let the berries shine without being too fussy, something that felt more like summer than a formal dessert. The first batch came out golden and tender, and honestly, they disappeared faster than I could cut them into squares. Now whenever I see fresh strawberries at the market, this is what I make.
I brought a pan of these to a potluck last July, not expecting much fanfare, and three people asked for the recipe by the end of the night. One woman said they reminded her of something her grandmother used to make, which made me realize that simple, honest desserts have a way of landing differently than anything too trendy. That's when these became my go-to whenever I need something that feels personal without being pretentious.
Ingredients
- All-purpose flour (2 cups): The foundation of the bar, and measuring by weight keeps things consistent since flour can settle differently in the bag.
- Baking powder and baking soda (1/2 tsp and 1/4 tsp): These two work together to give the bars that tender, cake-like crumb without making them too cakey or dense.
- Salt (1/4 tsp): A small amount that most people won't consciously taste but will make every other flavor pop just a little brighter.
- Unsalted butter (1/2 cup, softened): Softening it beforehand saves time and means you won't overmix the dough trying to incorporate cold butter.
- Granulated and brown sugar (3/4 cup and 1/4 cup): The combination gives you sweetness with a slight caramel undertone that white chocolate loves.
- Egg and vanilla extract (1 large egg and 1 tsp): The egg binds everything and adds a touch of richness, while vanilla deepens the flavor without announcing itself.
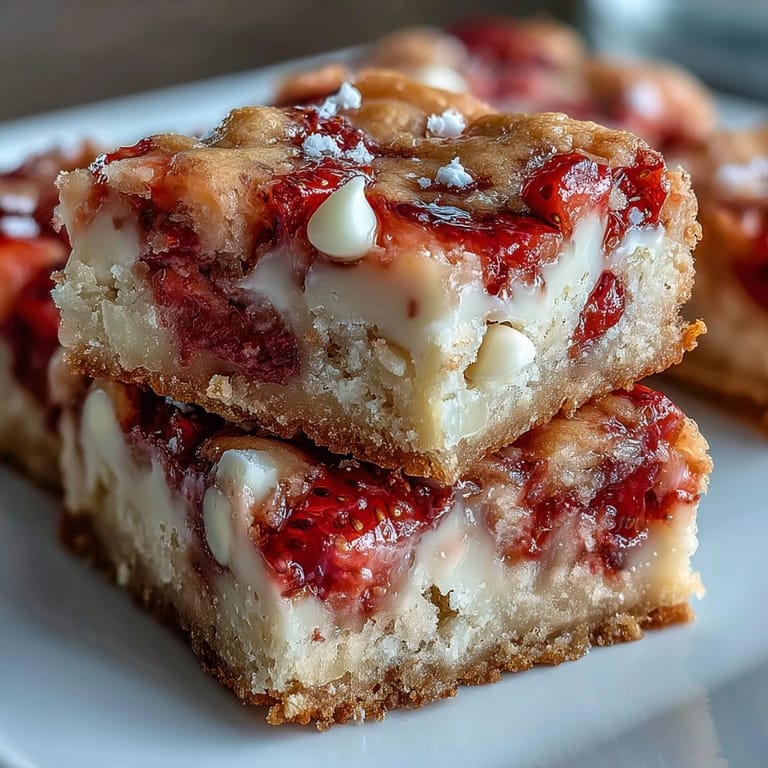
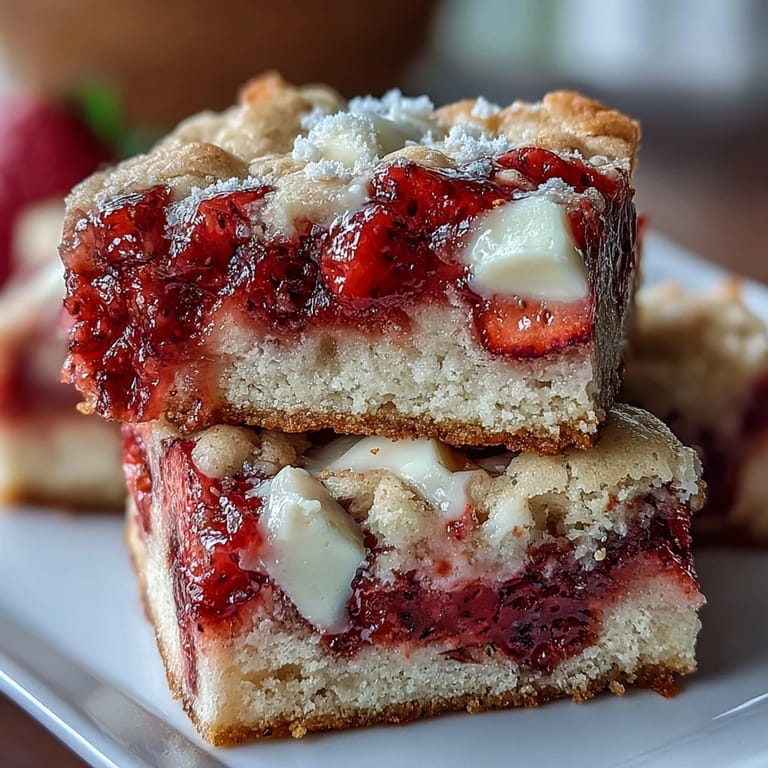
- Fresh strawberries (1 cup, diced): The star of the show, and their juice actually helps keep the bars moist—just make sure they're ripe and fragrant, not pale and watery.
- White chocolate chunks (3/4 cup): These add creamy sweetness and little pockets of indulgence throughout, especially if you use good quality chocolate.
Tired of Takeout? 🥡
Get 10 meals you can make faster than delivery arrives. Seriously.
One email. No spam. Unsubscribe anytime.
Instructions
- Get your oven and pan ready:
- Preheat to 350°F and line your 8x8-inch pan with parchment paper, letting the edges hang over the sides so you can lift the whole thing out later without wrestling with it. This small step saves so much frustration when you're excited to cut into the finished bars.
- Combine your dry ingredients:
- Whisk the flour, baking powder, baking soda, and salt together in a medium bowl. Setting them aside means you won't have to hunt for them when you're ready to add them to the wet mixture.
- Cream the butter and sugars:
- Beat them together for about 2 to 3 minutes until the mixture looks pale and fluffy, like soft clouds. You'll know you've done it right when you can barely see the granules of sugar.
- Bring everything together:
- Add your egg and vanilla to the butter mixture, stirring until you don't see any streaks of egg white anymore. Then gently add the dry ingredients, stirring just until combined—this is where you resist the urge to overmix, since that's what makes bars tough instead of tender.
- Fold in the fruit and chocolate:
- Use a spatula to gently fold in the strawberries and white chocolate chunks, being careful not to crush the berries too much. Some people worry about the berries making the dough wet, but fresh strawberries at their peak are mostly flavor, not excess moisture.
- Spread and bake:
- Pour the dough into your prepared pan and smooth it into an even layer with a spatula. Bake for 22 to 25 minutes, until the top is golden and a toothpick inserted in the center comes out with just a few moist crumbs attached—not completely clean, because that means you've gone slightly too far.
- Cool with patience:
- Let the bars cool completely in the pan on a wire rack before you lift them out and cut them. I know the smell is tempting, but this waiting time is when they finish setting up and become easy to cut cleanly.
 Pin it
 There's a moment when you pull these bars out of the oven and the smell hits you—butter and vanilla and something bright from the strawberries all mixed together—that feels like the essence of a good afternoon. Someone once told me that the best desserts are the ones that make people pause mid-conversation to take another bite, and these do that every single time.
White Chocolate Choices
I've experimented with different brands and types of white chocolate, and the quality really shows in the finished bars. Cheaper white chocolate sometimes tastes waxy and one-dimensional, while good quality chunks or chips add a creamy sweetness that feels almost luxurious. If you can find white chocolate chips at a quality baking supply store, they're worth seeking out, but even standard grocery store white chocolate chunks will work fine if that's what you have on hand.
Strawberry Season Timing
These bars taste best when strawberries are at their peak—usually late spring through early summer, depending on where you live. Out of season, strawberries can be mealy and flavorless, which completely changes the character of the bars. I've learned that waiting for the right season or using the farmers market instead of the supermarket makes a bigger difference than any technique adjustment ever could.
Storing and Serving
These bars keep surprisingly well in an airtight container at room temperature for up to three days, though they're honestly best on the first day when they're still tender and the white chocolate has that slightly melted quality. After that, they're still delicious but will start to firm up a bit, which some people actually prefer. If you want to extend their life, you can freeze them for up to a month, and they thaw beautifully without becoming soggy or hard.
- Let the bars cool completely before storing them, or condensation will make them damp.
- Pack them with parchment paper between layers so the chocolate doesn't stick to anything.
- These make wonderful gifts when wrapped in a box with some tissue paper, especially during spring gatherings.
 Pin it
 These bars have become my quiet anchor dessert for when I want to feed people something that feels both easy and a little bit special. They're the kind of thing you can make on a regular Tuesday afternoon and still have everyone asking for seconds.
Recipe FAQs
- → How do I keep the bars moist?
Ensure not to overbake and allow the bars to cool completely in the pan to retain moisture and texture.
- → Can frozen strawberries be used?
Yes, but thaw and pat them dry thoroughly to avoid excess moisture in the batter.
- → What is a good alternative to white chocolate chunks?
Dark or milk chocolate chunks work well and add a different flavor profile to the bars.
- → How should the bars be stored?
Store in an airtight container at room temperature for up to three days to maintain freshness.
- → Are these bars suitable for vegetarian diets?
Yes, they use ingredients compliant with vegetarian dietary preferences.
- → What baking pan size is recommended?
Use an 8x8-inch (20x20 cm) pan lined with parchment paper for easy removal and even baking.