 Pin it
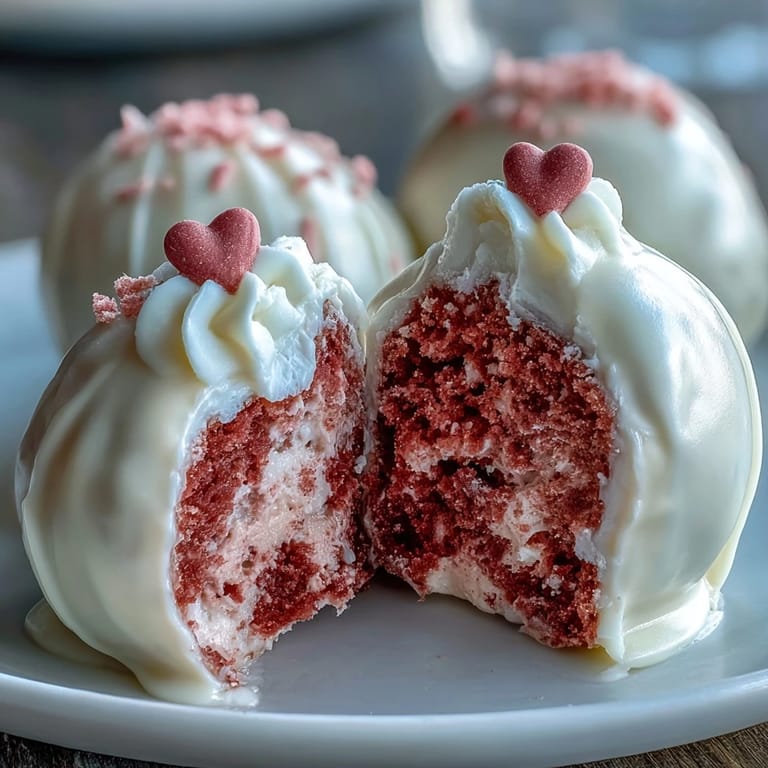
 My sister texted me a photo of pink velvet cake pops from a fancy bakery, captioned with just a heart emoji and a price tag that made me laugh out loud. Twenty dollars for six tiny cake balls seemed like highway robbery, so I decided to figure out how to make them myself. Three hours later, my kitchen smelled like cocoa and butter, my hands were stained with pink food coloring, and I had two dozen perfect little spheres that tasted infinitely better than anything I could have bought. Now whenever someone needs a gift that feels both thoughtful and indulgent, these are what I reach for.
I made these for a Galentine's party last year where everyone was supposed to bring something heart-themed, and I watched my best friend's face light up when she bit into one. She immediately asked for the recipe, and then I realized I'd accidentally created something that people actually wanted to replicate, which felt like the highest compliment possible.
Ingredients
- All-purpose flour: The structure of your cake pops depends on this, so don't skip sifting it if you want an extra tender crumb.
- Granulated sugar: This sweetens the cake and helps create that tender texture that makes cake pops crumbly in the best way.
- Unsweetened cocoa powder: Just a quarter cup gives you that velvet cake depth without making it taste like chocolate cake, trust me on this.
- Baking soda: This reacts with the vinegar and buttermilk to give the cake its lift and that subtle tangy note.
- Buttermilk: Room temperature buttermilk makes a real difference in how the batter comes together, so don't just grab it cold from the fridge.
- Unsalted butter: Softened butter creams properly and distributes evenly, which means every cake pop tastes consistent.
- Eggs: Also room temperature for the same reason as the buttermilk, they incorporate better and make the crumb more tender.
- Vanilla and white vinegar: These two work together to enhance the cocoa and add complexity that makes people wonder what you actually put in here.
- Pink gel food coloring: Gel color is more concentrated than liquid, so you get that vibrant pink without watering down your batter.
- Cream cheese and butter: The frosting base needs both for tang and richness, and they absolutely must be softened or your frosting will be gritty.
- Powdered sugar: Sifting it prevents lumps that'll break your frosting's smooth texture.
- White chocolate or candy melts: Candy melts are easier to work with for dipping, but if you use real white chocolate, you'll need to add a little coconut oil to thin it slightly.
Tired of Takeout? 🥡
Get 10 meals you can make faster than delivery arrives. Seriously.
One email. No spam. Unsubscribe anytime.
Instructions
- Set your oven and prep your pan:
- Preheat to 350°F and line an 8-inch square pan with parchment. This prevents sticking later when you're crumbling the cake.
- Combine your dry ingredients:
- Whisk together flour, sugar, cocoa powder, baking soda, and salt. Getting these mixed properly now means they distribute evenly when you add them to the wet mixture.
- Cream your butter and beat in the eggs:
- Beat softened butter until it's pale and fluffy, then add eggs one at a time, making sure each one is fully incorporated before the next. This creates tiny air pockets that make your cake tender.
- Add the vanilla and vinegar:
- These seem small but they're crucial for flavor, so don't skip them.
- Alternate wet and dry ingredients:
- Add the dry mixture and buttermilk in alternating batches, starting with dry and ending with dry, mixing only until just combined. Overmixing makes the cake tough, which is the opposite of what you want.
- Add your pink color:
- Drizzle in the gel food coloring and stir until you have that even, vibrant pink throughout. It'll look almost neon at first, then settle into a beautiful pale pink as it bakes.
- Bake until golden:
- Pour into your pan and bake for 22 to 25 minutes until a toothpick comes out clean. The smell at this point is intoxicating.
- Make your cream cheese frosting:
- Beat softened cream cheese and butter together until smooth, then gradually add sifted powdered sugar followed by vanilla, beating until you have fluffy frosting. This takes about three minutes of beating.
- Combine cake and frosting:
- Crumble the completely cooled cake into a bowl and mix with the frosting until the mixture holds together when you press it, kind of like damp sand. If it's too dry, add a bit more frosting; if it's too wet, you'll have trouble rolling it.
- Roll into balls:
- Roll mixture into 1-inch balls and place on a parchment-lined baking sheet. You should get about 24.
- Chill your cake balls:
- Refrigerate for 30 minutes so they're firm enough to dip without falling apart.
- Melt your chocolate:
- Melt white chocolate or candy melts in the microwave in 20-second bursts, stirring between each burst so it doesn't scorch. Scorched chocolate tastes bitter and bitter cake pops are sad.
- Secure the sticks:
- Dip the tip of each stick into melted chocolate, then insert it halfway into each ball. Chill for 10 more minutes so the sticks stay put.
- Dip and decorate:
- Dip each cake pop into the melted chocolate, tapping off excess gently so you don't lose your whole coating, then immediately add sprinkles or candies while the chocolate is still wet. If you wait, the toppings won't stick.
- Set them upright:
- Place cake pops upright in a styrofoam block or cake pop stand so they dry completely, which takes about an hour.
 Pin it
 There's something about making cake pops that feels like you're creating tiny edible jewelry, and I'll never forget my coworker offering to pay me to make a batch for her daughter's birthday party. I refused payment but absolutely made them, and seeing that little girl's face when she bit into one and tasted the cream cheese frosting made my whole week.
Storage and Make Ahead
These actually keep really well in the refrigerator for up to five days in an airtight container, which means you can make them the day before your event and genuinely relax instead of stressing about last minute baking. I've learned that they do need to stay chilled because the cream cheese frosting softens at room temperature, so don't leave them out on a warm day or they'll start sliding off their sticks.
Flavor Variations Worth Trying
Once you nail the basic recipe, this is the fun part where you get creative without totally starting over. I've swapped the white chocolate coating for dark chocolate, which gives them a more grown-up vibe, and I've also used strawberry-flavored candy melts for a pretty pink-on-pink situation that somehow works.
Common Mistakes and How to Avoid Them
The most frequent thing that goes wrong is either over-mixing the batter, which makes the cake tough instead of tender, or not chilling long enough, which means your beautiful cake pops fall apart mid-dip. Sometimes people also overthink the pink coloring and add way too much food coloring, turning their cake gray instead of pink, so start with less and add more if you need it.
- If your frosting is gritty or lumpy, your powdered sugar wasn't sifted or your cream cheese and butter weren't soft enough, so take five minutes to fix it before combining with cake.
- If the cake pop sticks keep spinning in the balls, chill them a bit longer and make sure you're inserting the stick quickly and decisively rather than wiggling it around.
- If your chocolate coating is too thick and gloopy, add a teaspoon of coconut oil at a time until it reaches that silky consistency that coats without pooling.
 Pin it
 These cake pops have become my answer to the question of what to bring when I want to show up for someone but don't have much time. They're small enough to feel delicate and special, but substantial enough that people actually feel satisfied after eating one.
Recipe FAQs
- → How do I achieve a vibrant pink color?
Use gel-based pink food coloring and adjust the amount to reach your desired shade without altering batter consistency.
- → Can I substitute white chocolate for the coating?
Yes, white chocolate or candy melts both work well and provide a smooth, sweet coating.
- → How should I store the cake pops?
Keep them in an airtight container in the refrigerator for up to five days to maintain freshness.
- → What is the best way to mix frosting into the cake crumbs?
Combine gradually, folding gently until the mixture sticks together well enough to shape without falling apart.
- → Can the cake pops be made ahead of time?
Yes, prepare the balls and chill them before dipping; they can be stored in the fridge before coating.