 Pin it
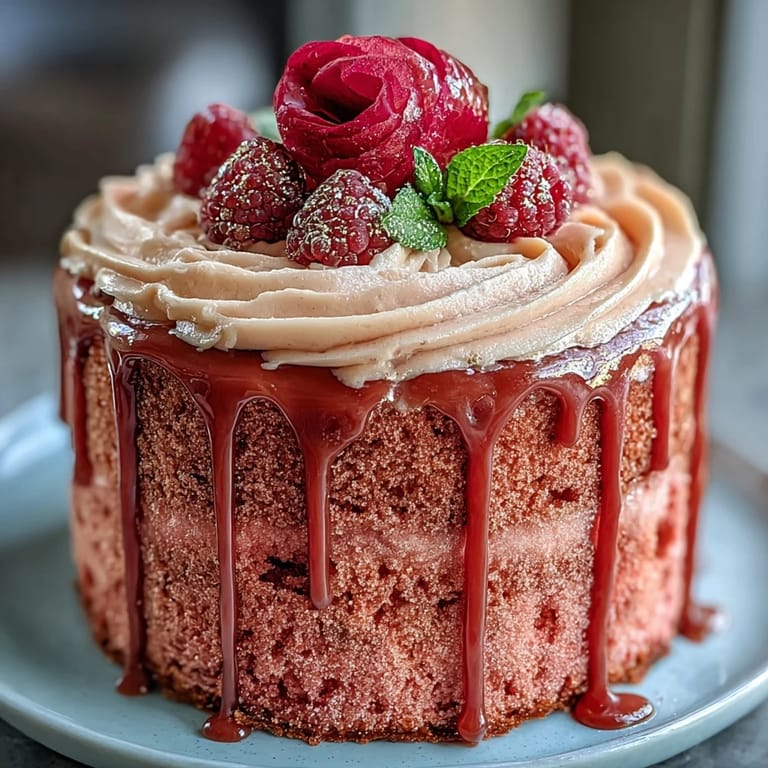
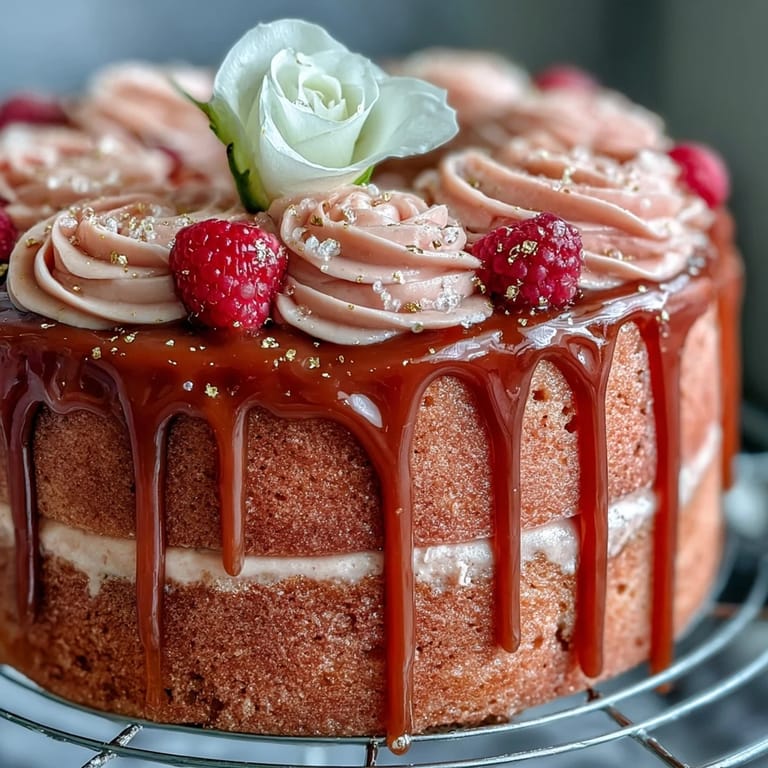
 The first time I made this Rosé Velvet Cake, the kitchen filled with a haze of vanilla, cocoa, and the faintest lifting scent of rosé—honestly, it was the shimmer of gold that drew me in. Instead of the usual pre-party panic, I found myself humming along with the mixer, smudges of pink frosting already dotting my apron. The trickiest part was keeping curious hands out of the buttercream before it went onto the cake. I never expected to enjoy swirling edible gold paint onto drips of white chocolate so much—there’s something quietly thrilling about turning a cake into a celebration centerpiece. And, as I stepped back to admire it, even my usually cake-indifferent partner couldn’t help but lean in for a look.
Last spring, my friend asked me to bring something special for her bridal shower, and suddenly this cake became the heart of the festivities. While we sipped bubbly and laughed over old stories, the moment the knife touched those gold-dripped layers, the whole room went silent in anticipation—that was the real magic.
Ingredients
- All-purpose flour: Sift it well to get that famously velvety crumb—trust me, any lumps show in the final texture.
- Granulated sugar: Balances the mild acidity of the rosé and brings a classic sweetness that’s not overpowering.
- Baking soda: Gives just enough lift for a tender, cloud-like bite.
- Fine salt: Even a little salt brings out the subtle cocoa and wine notes.
- Cocoa powder (unsweetened): Adds depth and a gentle chocolate backdrop—only a spoonful, so it won’t overshadow the pink!
- Vegetable oil: I use oil instead of butter for the softest, silkiest layers.
- Large eggs, room temperature: They emulsify better when not straight from the fridge—no curdled batter, ever.
- Buttermilk, room temperature: Adds tang and tenderness; don’t substitute regular milk if you want true velvet.
- Rosé wine: Dry or sparkling makes the flavor fresh, not too sweet.
- Vanilla extract: The finishing note that ties everything together.
- White vinegar: Reacts with baking soda for that classic velvet texture—don’t skip it!
- Pink or rose gel food coloring: Gel is key for vibrant color without watering down your batter—a lesson learned after too many pale cakes.
- Unsalted butter, room temperature: Beat until it’s almost fluffy air for the smoothest possible buttercream.
- Powdered sugar, sifted: It dissolves fast and leaves no gritty bits, so don’t rush this step.
- Rosé wine (for buttercream): Perks up the frosting and echoes the cake flavor—add slowly so the frosting doesn’t break.
- Heavy cream: Helps your melted white chocolate drip easily while staying glossy.
- White chocolate chips: They set softer than bars, perfect for drips that don’t get crunchy.
- Edible gold luster dust: Not just pretty—makes the drizzle feel extra celebratory (always check for ‘edible’ on the label!).
- Vodka or clear lemon extract: Used for mixing with the gold dust—evaporates, leaving only shine behind.
Tired of Takeout? 🥡
Get 10 meals you can make faster than delivery arrives. Seriously.
One email. No spam. Unsubscribe anytime.
Instructions
- Set up for success:
- Preheat your oven to 350°F (175°C). Grease and line three 8-inch pans with parchment and, if you want truly even cakes, weigh out the batter for each pan.
- Sift and whisk:
- In a large bowl, sift together the flour, sugar, baking soda, salt, and cocoa powder—notice how the cocoa barely tinges the dry mix, just right.
- Mix the wet ingredients:
- Whisk the oil, eggs, buttermilk, rosé, vanilla, and vinegar until the mixture looks creamy and gently frothy.
- Combine and color:
- Pour the wet ingredients into the dry and stir until just combined; the batter should be thick but pourable. Swirl in gel food coloring a little at a time—pause to admire the blush shade before adding more.
- Bake the layers:
- Divide among the pans, smoothing the tops. The cakes should dome just a bit in the oven and spring back when touched—check with a toothpick after 30 minutes.
- Cool completely:
- Let cakes rest in the pans for 10 minutes before turning out onto a rack. Waiting for them to cool is the perfect time to start the buttercream.
- Whip the buttercream:
- Beat the butter on high until nearly white, then slowly add sifted powdered sugar. Pour in rosé, vanilla, and a pinch of salt, then whip until light and spreadable.
- Build the layers:
- Level the cooled cakes if needed. Stack, spreading buttercream between each layer, then cover the outside with a thin crumb coat—chill briefly before a final sweeping coat of frosting.
- Make the gold drip:
- Melt white chocolate and cream together till smooth and let cool a bit. Stir gold luster dust with vodka or lemon extract to make a shimmery gold paint.
- Decorate with gold:
- Drizzle cooled white chocolate around the cake’s edge, letting some flow over the sides. Once it’s set, carefully paint the drips with your edible gold for showstopping shimmer.
- Finish to impress:
- If you like, add more gold touches, rose petals, or berries for the final flourish. Step back and admire before serving!
 Pin it
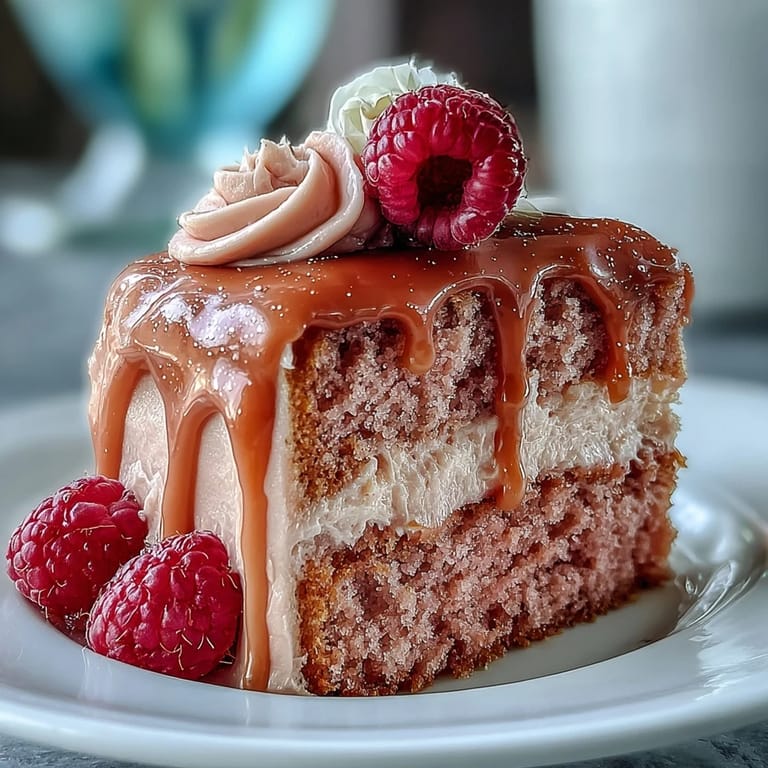
 I’ll never forget the way the cake gleamed under the fairy lights as everyone gathered around; there’s something about sharing food this beautiful that brings people closer. For a moment, slicing into those rose-tinted layers felt like giving a gift far more memorable than any registry find.
Decorating Like a Pro at Home
The first time I tried this gold drip technique, my hands shook and I was convinced I’d ruin everything—but good chocolate sets up forgivingly. If you go slow, and your tools are clean, it’s almost meditative (plus, any less-than-perfect drip can always be hidden with a petal or two!).
Picking the Perfect Rosé
The wine you choose really matters—a crisp, dry rosé keeps the cake light and fresh rather than candy-sweet. I like using a sparkling version if I have it, which seems to make everyone smile a little more (including me, when taste-testing the buttercream scraps).
Party Prep and Make-Ahead Strategies
I’ve learned that assembling the cake the day before actually makes frosting easier, as the layers firm up and the flavor settles in beautifully. If you’re decorating just before serving, keep your edible gold dust and paintbrush ready for last-minute touch-ups.
- Store leftovers in the fridge, but bring slices to room temp for the softest bite.
- Already-leveled cakes freeze beautifully for up to a month—just wrap tightly.
- Don’t forget to wipe your knife between slices for picture-perfect plating every time.
 Pin it
 Every time I make this cake, I’m reminded how much joy lives in the details—from pink-stained fingertips to the glint of gold in late afternoon light. I hope your kitchen feels just as full of sparkle, laughter, and sweet anticipation.
Recipe FAQs
- → Can I replace the rosé with a nonalcoholic option?
Yes — substitute an equal amount of unsweetened sparkling grape juice or a concentrated white grape reduction to retain the fruity note without alcohol. Adjust sweetness to taste.
- → How do I keep the buttercream stable for stacking?
Beat unsalted butter until very light, add powdered sugar gradually, and chill the crumb coat before the final layer. If climate is warm, refrigerate between steps to maintain structure.
- → What’s the safest way to make the gold drip edible?
Use white chocolate and cream for the drip base, cool slightly, then paint with edible gold luster mixed with a food-safe clear extract or approved alcohol. Only use food-grade luster dust labeled edible.
- → Which rosé works best for flavor?
Choose a dry or off-dry rosé with bright red-fruit notes; a sparkling rosé adds a subtle floral lift. Avoid overly tannic or heavily oaked bottles to keep the batter balanced.
- → Can this be prepared ahead of time?
Yes — bake and cool layers a day ahead, chill after crumb coating, and finish with the final buttercream and gold drip within 24 hours. Bring to room temperature before serving for optimal texture.
- → How do I get an even pink shade throughout the cake?
Use gel food coloring for concentrated hue; mix into the batter until evenly distributed. Start with a small amount and build to the desired rosy tone to avoid altering batter consistency.